使用manifest yaml文件搭建Stable Diffusion 1.5模型图片生成服务
在这个示例中,我们通过定义一个manifest yaml文件,即可在EverAI平台上创建一个一个基于Stable Diffusion 1.5模型的图片生成在线服务。这种方法无需在你的已有的业务代码中引入EverAI SDK代码,便可以把你的应用部署到EverAI平台。
登录EVERAI客户端
首先,为你的应用创建一个目录,进入应用目录后,需要使用你从EverAI获取到的token进行登录。
everai login --token <your token>
准备存储
创建一个数据卷用于存放模型文件。
everai volume create models--runwayml--stable-diffusion-v1-5
你可以通过everai volume get命令获取到卷models--runwayml--stable-diffusion-v1-5的本地路径。进入卷的本地路径后,可以把你的模型文件复制到该路径下。
通过everai volume push命令,把数据卷models--runwayml--stable-diffusion-v1-5在本地环境中的模型文件,推送到云端。
everai volume push models--runwayml--stable-diffusion-v1-5
在当前应用目录下,创建一个软连接来挂载卷models--runwayml--stable-diffusion-v1-5的本地路径。
ln -s /root/.cache/everai/volumes/Xo6zoFc4986CrD7dYuNrwr volume
编写你的代码
加载模型
这是一个关于app.py的示例代码。
你在本地环境使用python run调试示例代码加载模型时,模型文件会从本地环境的私有卷models--runwayml--stable-diffusion-v1-5中读取。如果你的本地调试环境有GPU资源(英伟达GPU或者具有Metal编程框架的苹果GPU),系统会成功执行python run。
from diffusers import StableDiffusionPipeline, StableDiffusionImg2ImgPipeline
import torch

MODEL_NAME = 'runwayml/stable-diffusion-v1-5'
HUGGINGFACE_SECRET_NAME = os.environ.get("HF_TOKEN")

app = Flask(__name__)

VOLUME_NAME = 'volume'

txt2img_pipe = None
img2img_pipe = None

def prepare_model():
    volume = VOLUME_NAME
    huggingface_token = HUGGINGFACE_SECRET_NAME

    model_dir = volume

    global txt2img_pipe
    global img2img_pipe

    txt2img_pipe = StableDiffusionPipeline.from_pretrained(MODEL_NAME,
                                                        token=huggingface_token,
                                                        cache_dir=model_dir,
                                                        variant='fp16',
                                                        torch_dtype=torch.float16,
                                                        low_cpu_mem_usage=False,
                                                        local_files_only=True
                                                        )

    # The self.components property can be useful to run different pipelines with the same weights and configurations without reallocating additional memory.
    # If you just want to use img2img pipeline, you should use StableDiffusionImg2ImgPipeline.from_pretrained below.
    img2img_pipe = StableDiffusionImg2ImgPipeline(**txt2img_pipe.components)
    #img2img_pipe = StableDiffusionImg2ImgPipeline.from_pretrained(MODEL_NAME,
    #                                                            token=huggingface_token,
    #                                                            cache_dir=model_dir,
    #                                                            variant='fp16',
    #                                                            torch_dtype=torch.float16,
    #                                                            low_cpu_mem_usage=False,
    #                                                            local_files_only=True
    #                                                            )

    if torch.cuda.is_available():
        txt2img_pipe.to("cuda")
        img2img_pipe.to("cuda")
    elif torch.backends.mps.is_available():
        mps_device = torch.device("mps")
        txt2img_pipe.to(mps_device)
        img2img_pipe.to(mps_device)
实现推理服务
文生图
加载Stable Diffusion 1.5模型后,这里的代码使用了flask实现了文生图的推理在线服务。
import flask
from flask import Response

import io

# service entrypoint
# api service url looks https://everai.expvent.com/api/routes/v1/default/sd-v1-5-manifest-private/txt2img
# for test local url is http://127.0.0.1:8866/txt2img
@app.route('/txt2img', methods=['GET','POST'])
def txt2img():
    if flask.request.method == 'POST':
        data = flask.request.json
        prompt = data['prompt']
    else:
        prompt = flask.request.args["prompt"]

    pipe_out = txt2img_pipe(prompt)

    image_obj = pipe_out.images[0]

    byte_stream = io.BytesIO()
    image_obj.save(byte_stream, format="PNG")

    return Response(byte_stream.getvalue(), mimetype="image/png")
图生图
这里的代码使用了flask实现了图生图的推理在线服务。
import PIL
from io import BytesIO

# service entrypoint
# api service url looks https://everai.expvent.com/api/routes/v1/default/sd-v1-5-manifest-private/img2img
# for test local url is http://127.0.0.1:8866/img2img
@app.route('/img2img', methods=['POST'])
def img2img():
    f = flask.request.files['file']
    img = f.read()

    prompt = flask.request.form['prompt']

    init_image = PIL.Image.open(BytesIO(img)).convert("RGB")
    init_image = init_image.resize((768, 512))

    pipe_out = img2img_pipe(prompt=prompt, image=init_image, strength=0.75, guidance_scale=7.5)

    image_obj = pipe_out.images[0]

    byte_stream = io.BytesIO()
    image_obj.save(byte_stream, format="JPEG")

    return Response(byte_stream.getvalue(), mimetype="image/jpg")
实现就绪探针服务
如果设置了就绪探针服务,探针状态准备好(状态码为200)之前,不会有任何客户端请求被路由到这个worker容器中。否则, 只要容器状态可用,即使worker容器中的模型文件加载到GPU内存的过程还没完成,EverAI平台就会路由客户端请求到这个worker容器。
目前探针实现只支持HTTP的get和post方法。
@app.route('/healthy-check', methods=['GET'])
def healthy():
    resp = 'service is ready'
    return resp

if __name__ == '__main__':
    prepare_model()
    app.run(host="0.0.0.0", debug=False, port=8866)
构建镜像
这步需要使用Dockerfile来为你的应用构建容器镜像。
这是一个Dockerfile的示例代码。
你可以选择使用公共镜像仓库存放应用镜像。如:quay.io,Docker Hub,GitHub Container Registry,Google Container Registry等。如果你有自建的镜像仓库,并且镜像可以在互联网上被访问,同样可以使用。
首先确保你的docker环境处于登录状态。 推荐使用docker buildx构建支持多平台架构的Docker镜像,并把打包好的镜像推送到你指定的镜像仓库中。
创建密钥
密钥管理提供了一种安全的方法,可以添加凭证和其他敏感信息到你的应用容器中。
是否需要创建密钥,取决于下载模型文件和拉取Docker镜像时是否需要安全验证。
你可以在EverAI中创建和编辑密钥,或者通过编写Python代码来管理它。
在这个例子中,我们会为quay.io创建一个密钥。
everai secret create your-quay-io-secret-name \
  --from-literal username=<your username> \
  --from-literal password=<your password>
定义Manifest文件
manifest文件定义了创建EverAI应用所需要的各种信息,包括应用名称,镜像名称,密钥信息,数据卷信息等。
这是一个关于app.yaml的示例代码。
部署
最后一步是把你的应用部署到EverAI。并使它保持在运行状态。
everai app create --from-file app.yaml
执行everai app list后,可以看到类似如下的输出结果。CREATED_AT使用UTC时间显示。
如果你的应用状态是DEPLOYED,并且已经准备就绪的worker容器数量等于期望的worker容器数量,即1/1,意味着你的应用已经部署成功。
NAME                               NAMESPACE    STATUS    WORKERS    CREATED_AT
---------------------------------  -----------  --------  ---------  ------------------------
sd-v1-5-manifest-private           default      DEPLOYED  1/1        2024-06-20T14:23:18+0000
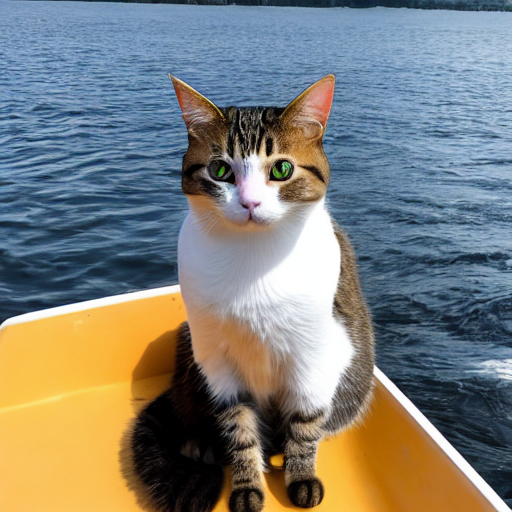
你可以使用curl执行下面的请求来测试你部署的文生图代码,在控制台上的当前目录下会产生一张由大模型Stable Diffusion 1.5生成的图片。
curl -X POST -d '{"prompt": "a photo of a cat on the boat"}' -H 'Content-Type: application/json' -H'Authorization: Bearer <your_token>' -o test.png https://everai.expvent.com/api/routes/v1/<your namespace>/<your app name>/txt2img
打开图片,可以看到如下效果。
此外,你还可以使用curl执行下面的请求来测试你部署的图生图代码。
在使用curl请求之前,你需要先把sketch-mountains-input.jpg下载到你的本地目录下,在控制台终端的该目录下执行curl,会产生一张基于sketch-mountains-input.jpg这张原图和prompt由大模型Stable Diffusion 1.5生成的新的图片。
curl -X POST -F 'file=@sketch-mountains-input.jpg' -F "prompt=A fantasy landscape, trending on artstation" -H'Authorization: Bearer <your_token>' -o test.jpg https://everai.expvent.com/api/routes/v1/<your namespace>/<your app name>/img2img
原图示例如下所示。

打开基于原图和prompt生成的新图片,可以看到如下效果。